Before starting this procedure, please make sure a connection can be made via a console cable to the Palo Alto Networks device.
CLI
- Login to the device with the default username and password (admin/admin).
- Enter configuration mode using the command configure
- Change the system setting to static (DHCP is enabled by default)
admin@fw# set deviceconfig system type static
- Use the following command to set the IP address of the management interface:
admin@fw# set deviceconfig system ip-address <ip address> netmask <netmask> default-gateway <default gateway> dns-setting servers primary <DNS ip address>
- Commit the changes using the command commit
- Exit configuration mode by using the command exit and then confirm the configurations by running the command show interface management within configuration mode
admin@fw> show interface management
-------------------------------------------------------------------------------
Name: Management Interface
Link status:
Runtime link speed/duplex/state: 10000/full/up
Configured link speed/duplex/state: auto/auto/auto
MAC address:
Port MAC address 00:50:56:81:ad:e6
Ip address: 10.46.196.118
Netmask: 255.255.255.192
Default gateway: 10.46.196.65
Ipv6 address: unknown
Ipv6 link local address: fe80::250:56ff:fe81:ade6/64
Ipv6 default gateway:
-------------------------------------------------------------------------------
WebGUI:
Please use https://<ip address> to gain access to the WebGUI. Default IP is 192.168.1.1.
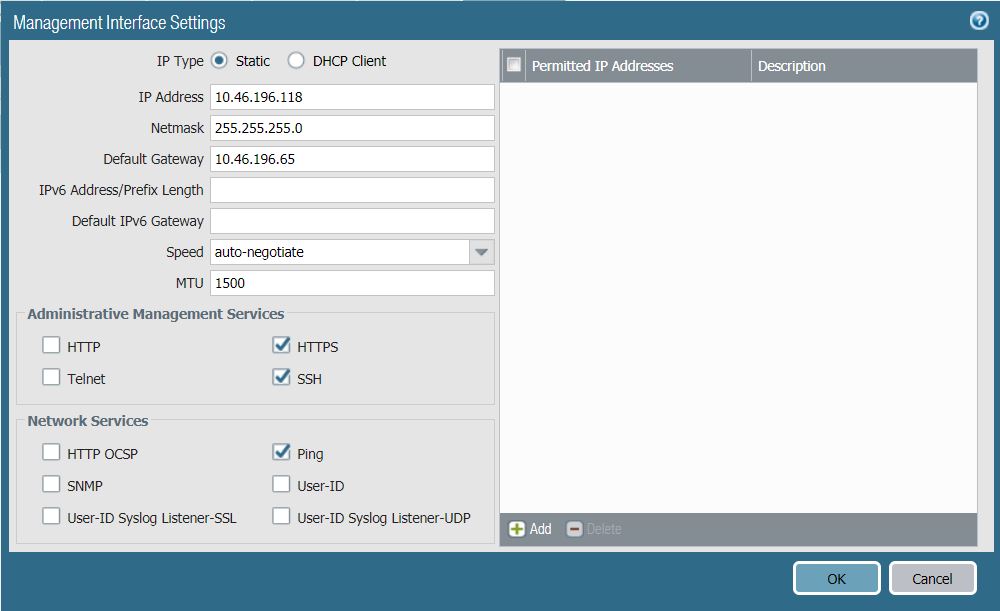
- Navigate to Device > Setup > Interfaces > Management
- Navigate to Device > Setup > Services, Click edit and add a DNS server.
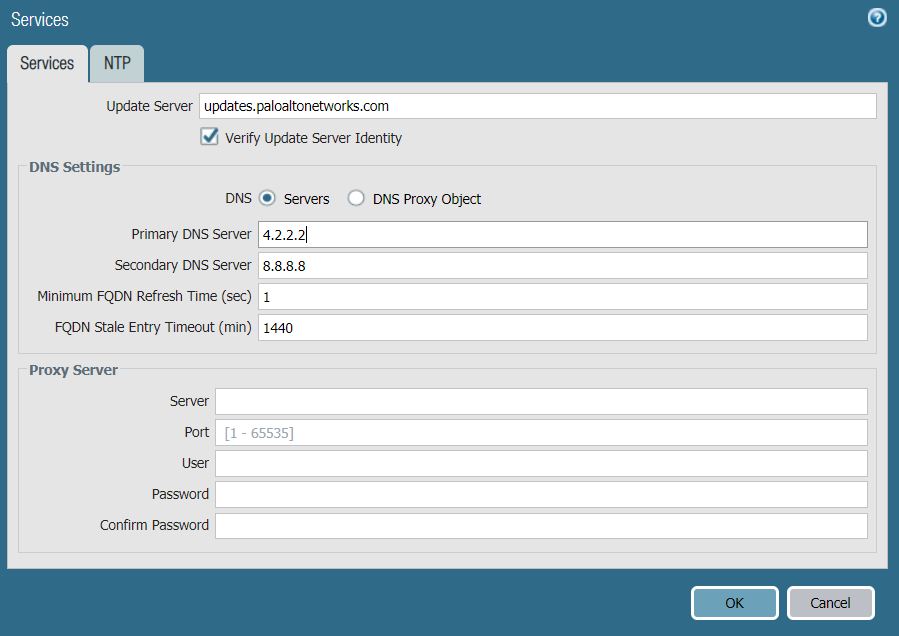
-
Click OK and click on the commit button in the upper right to commit the changes.
Note: When changing the management IP address and committing, you will never see the commit operation complete. This is because the new management IP address will take effect at 99% resulting in a disconnected GUI session. You will have to manually change the URL address to the new management IP to continue using the WebGUI.

